In the world of modern irrigation, the Solenoid Valve In Irrigation Systems plays a crucial role. John Doe, an expert in agricultural technology, once stated, "Efficient irrigation begins with smart valve choices." This highlights the importance of selecting the right components for optimal water management.
Using solenoid valves can enhance water flow control, reduce waste, and ensure plants receive the right amount of moisture. These valves operate electronically, allowing for automated irrigation schedules. However, proper installation and maintenance are vital for effectiveness. Many users neglect these aspects, leading to inefficiencies and increased operational costs.
While advanced technology simplifies irrigation, it also brings challenges. Misconfiguration or neglecting routine checks can cause system failures. It’s essential to understand both the benefits and the potential pitfalls of solenoid valves in your irrigation system. Awareness and proactive measures can make a significant difference in water conservation and crop health.
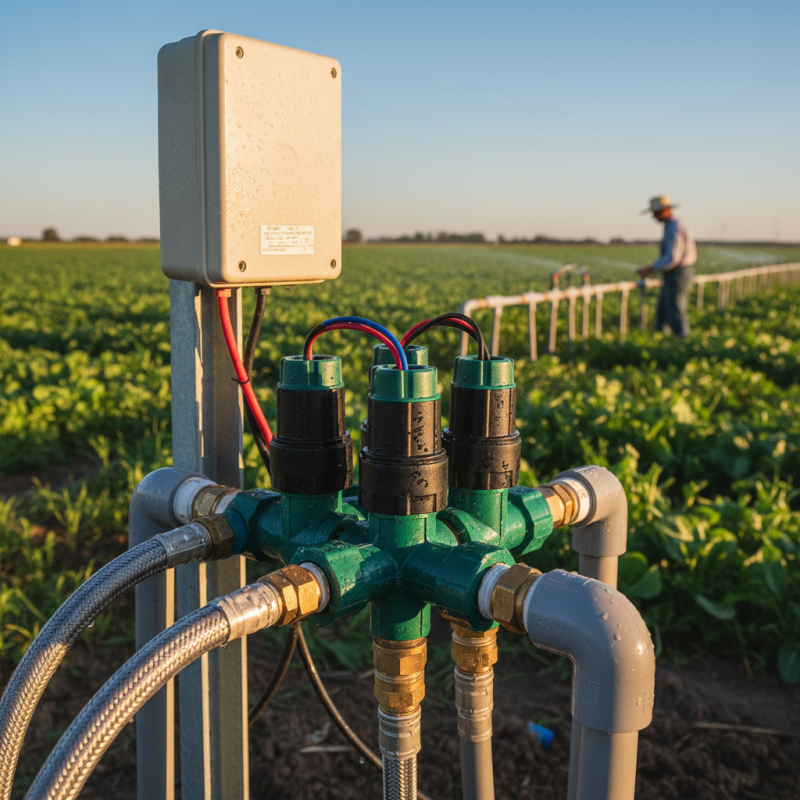
Solenoid valves play a crucial role in irrigation systems. They act as electronic switches that control the flow of water. By receiving signals from a timer or controller, they open or close automatically. This feature helps manage water usage efficiently. According to industry reports, using solenoid valves can increase water efficiency by up to 30%. Proper installation is key to optimizing their benefits.
Here’s a tip: Ensure your solenoid valves are located near the water source. This reduces the potential for pressure loss. It's also vital to keep them well-maintained. Regular checks can prevent leaks and malfunctions. Neglecting these checks might lead to wasted water, which can be costly.
Another point to consider is the size of your valves. Oversized valves can lead to inefficient watering. They may not close properly, causing excess water flow. Conversely, undersized valves might hinder water delivery. Both scenarios can affect your irrigation system's performance. Take the time to select the right size for your needs.
When designing an irrigation system, solenoid valves are essential components. There are a few types of solenoid valves that work best for these applications. First, you have the normally closed valve. This type remains shut until power is applied. It’s excellent for automatic systems. They prevent water waste in case of a power failure.
Another type is the normally open valve. These valves remain open until energized. They are ideal for specific situations, like draining or flushing systems. However, they require constant power to maintain the open position. It's also worth considering the diaphragm solenoid valve. This type is durable and resistant to sediment build-up. Yet, installation can be tricky, and mistakes can lead to leaks.
Lastly, the two-way and three-way valves are also popular. Two-way valves control flow to a single outlet. Three-way valves can direct flow between two outlets. Choosing the right type depends on your system's needs. Each type has advantages and challenges. It's important to evaluate your specific requirements carefully.
Installing solenoid valves in your irrigation system can significantly improve efficiency. This step-by-step guide will help you navigate the installation process.
Start by choosing the right solenoid valve for your irrigation needs. According to the Irrigation Association, selecting the appropriate valve can improve water distribution by up to 30%. Assess your water pressure and flow rate before making a decision. Gather tools such as a wrench, Teflon tape, and wire connectors.
Once you have your valve, shut off your water supply. Cut the irrigation line where you want to install the valve. Ensure that the area is clean and free of debris. Install the solenoid valve in line with the water flow direction indicated on the valve. Use Teflon tape on threaded ends to prevent leaks. Secure the connections with a wrench, but don’t overtighten.
Tip: Always check for leaks after installation. A small leak can lead to water waste and increased costs.
Next, wire the solenoid to your controller. Follow the manufacturer’s guidelines for proper connections. Double-check the wiring to avoid short circuits. It’s common for DIYers to overlook this step, leading to malfunctioning systems.
Tip: Test the system after installation. Monitor the performance for a few days to ensure everything operates smoothly.
Proper installation requires attention to detail. Even minor mistakes can impact your irrigation system's performance. Consider these factors and take your time for a successful setup.
Connecting solenoid valves to your irrigation control system can seem complex. However, with some careful steps, it becomes manageable. Begin by identifying your control system's output. This output will usually signal the on and off functions of the solenoid valves. You’ll need to ensure that your wiring matches the specifications of your control system. It's essential to review the manual beforehand; overlooking crucial details may lead to system malfunctions.
Next, prepare your solenoid valves for installation. Engage the wiring according to the polarity indicated in the valve's documentation. In some cases, the connection may be less intuitive than expected. Check for common mistakes, such as loose connections or incorrect wiring colors. Tighten connections firmly but avoid over-tightening, as this can damage components. After making these connections, power on your system and test each valve. If a valve doesn't operate as expected, revisit your wiring. Sometimes the simplest errors can lead to significant issues.
Moreover, frequent maintenance checks are vital. Ensure that every connection remains secure over time. Solenoid valves can wear out or become corroded, impacting performance. Regular testing helps in identifying problems early. The goal is to create a reliable irrigation system that conserves water and supports healthy plants. Monitoring and reflection will enhance your understanding of the system as you go along.
| Valve Type | Size (Inches) | Operating Pressure (psi) | Voltage (V) | Flow Rate (GPM) |
|---|---|---|---|---|
| Normally Closed | 1" | 15-50 | 24 | 20 |
| Normally Open | 3/4" | 20-60 | 12 | 15 |
| Battery Operated | 1/2" | 10-40 | 9 | 10 |
| Electric Valve | 1-1/4" | 25-75 | 110 | 30 |
| Solenoid Actuated | 2" | 30-65 | 24 | 50 |
Solenoid valves are essential in irrigation systems. However, they can encounter various issues. Common problems include wear and tear, electrical faults, and clogging. Understanding these issues helps maintain your system effectively.
One frequent problem is water flow inconsistencies. This could stem from debris clogging the valve. Flushing the system might help, but remember, some debris remains hard to remove. Inspecting for leaks is crucial as well. A small leak can cause significant water loss over time.
Another issue involves electrical connections. Corroded or loose wires lead to malfunctioning valves. Ensure connections are secure and clean. Regular checks can prevent problems from developing. Sometimes, it is frustrating to track down these issues. Patience and observation can make a significant difference.
1901 West Main Street
Washington, MO 63090
Main Directory: 1-800-227-4873
Email: sale@pangcofurniture.com

We’re always looking for talented individuals to join our team. Send us your resume using the form below. When a position comes available that matches your skillset, one of our team members will reach out to you.
"*" indicates required fields
